Welcome to the first part of our guide on using BroadPost for easy social media automation! In this tutorial, we'll walk through setting up a dedicated Notion database. This will be the main place for managing and scheduling all your social media content.
By following these steps, BroadPost will easily recognize and schedule your content, making your social media post management much smoother.
Step 1: Create a New Notion Page and Database
First, create a new page in your Notion workspace. You can call it Social Media Posts or Content Calendar, whatever makes sense for you. I’ve called my page Demo here. Once your new page is ready, add a full-page database. Choosing a full-page database gives you a clean and dedicated space just for your social media posts.
Step 2: Rename the Title Column
Every database needs a clear name for its entries. Notion's default column is Name, but for BroadPost to work best, we'll rename this to Title. This column will be the title for each of your social media posts, helping you easily find them in your content calendar.
Step 3: Add Key Properties: Status and Publish Date
Now, let's add two important properties that BroadPost will use to understand and accurately schedule your content:
- Status Column: Add a new property and choose the Select type for the Status column. This property lets you define different stages for your posts, like
Draft,Scheduled, orPublished. This helps you keep track of your content's journey. - Publish Date Column: Next, and very important for scheduling, add a Date type property called Publish Date. This tells BroadPost exactly when you want your posts to go live. For BroadPost to publish a post, its Status must be set to
Scheduledand thePublish Datemust be in the past. We'll explain more about scheduling in a later post.
Step 4: Define Your Status Values
With the Status property ready, let's set up its options. You can customize these to fit how you work, but here are three good options to start with:
- Draft: For posts you're still working on.
- Scheduled: For content that's finished and ready for BroadPost to automatically schedule and publish.
- Published: BroadPost will automatically change a post's status to
Publishedonce it has gone live on your social media platforms.
You can add these options by clicking on the Status column, selecting Edit property, and then adding each option. You can also remove any default options Notion might have added.
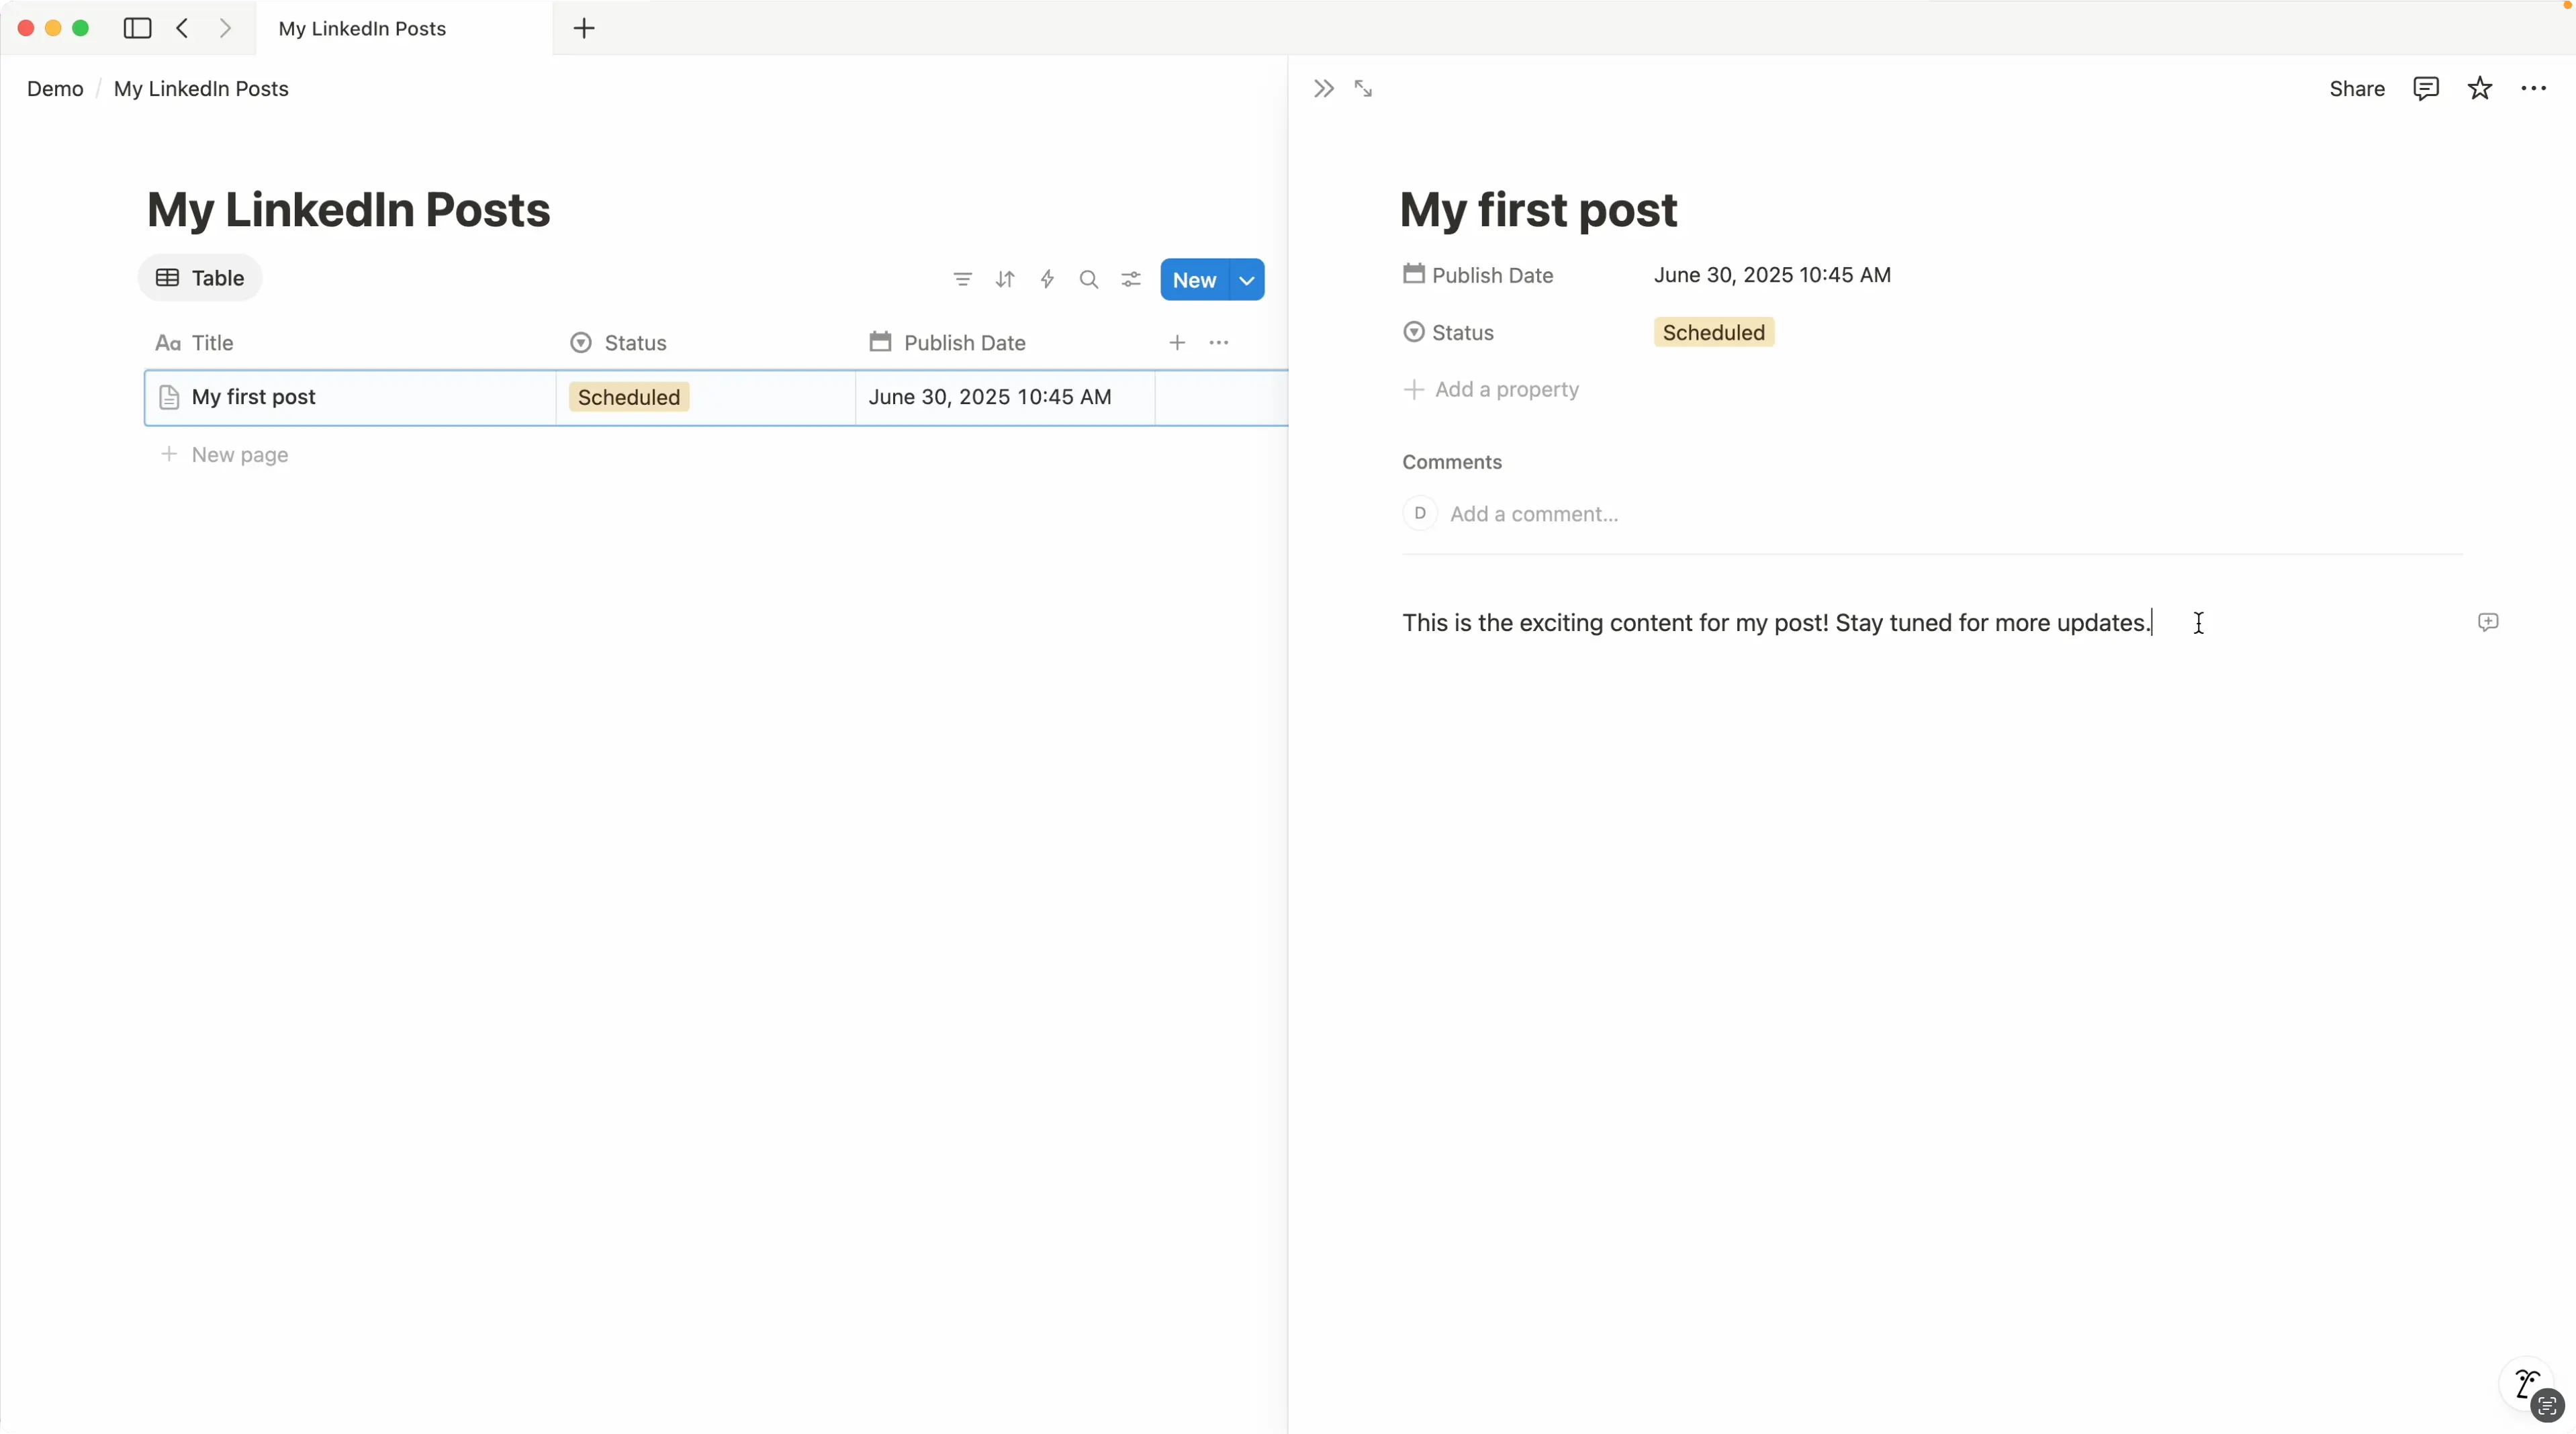
Step 5: Create Your First Post
To see your new database in action, let's create your very first social media post. Click "+ New" to add a new entry to the database.
- Add a Title: Give your post a clear title in the Title field, like My First Post.
- Add Content: Click inside the page of the new entry to open it. Type your actual social media content here. This is what will be published to your platforms.
- Optional: Set a Status and Publish Date. We will cover how to schedule and how publishing works in more detail later.
Our database should look something like the one in the screenshot below now.
Conclusion
Great job! You've successfully set up a Notion database that's perfectly organized for all your social media content. This foundation is essential for managing and scheduling your social media efficiently.
In our next post, we'll show you how to connect this Notion database to the BroadPost app, so you can start scheduling and automating your social media posts. Stay tuned!