Welcome back to the BroadPost tutorial series! We've successfully connected our Notion database and our LinkedIn profile. Now, it's time to unlock the true power of BroadPost: Workflows. This feature allows us to combine our content sources and social media destinations to automatically publish our posts exactly when and where we want them, making our social media management effortless.
Navigating to Workflows and Creating a New One
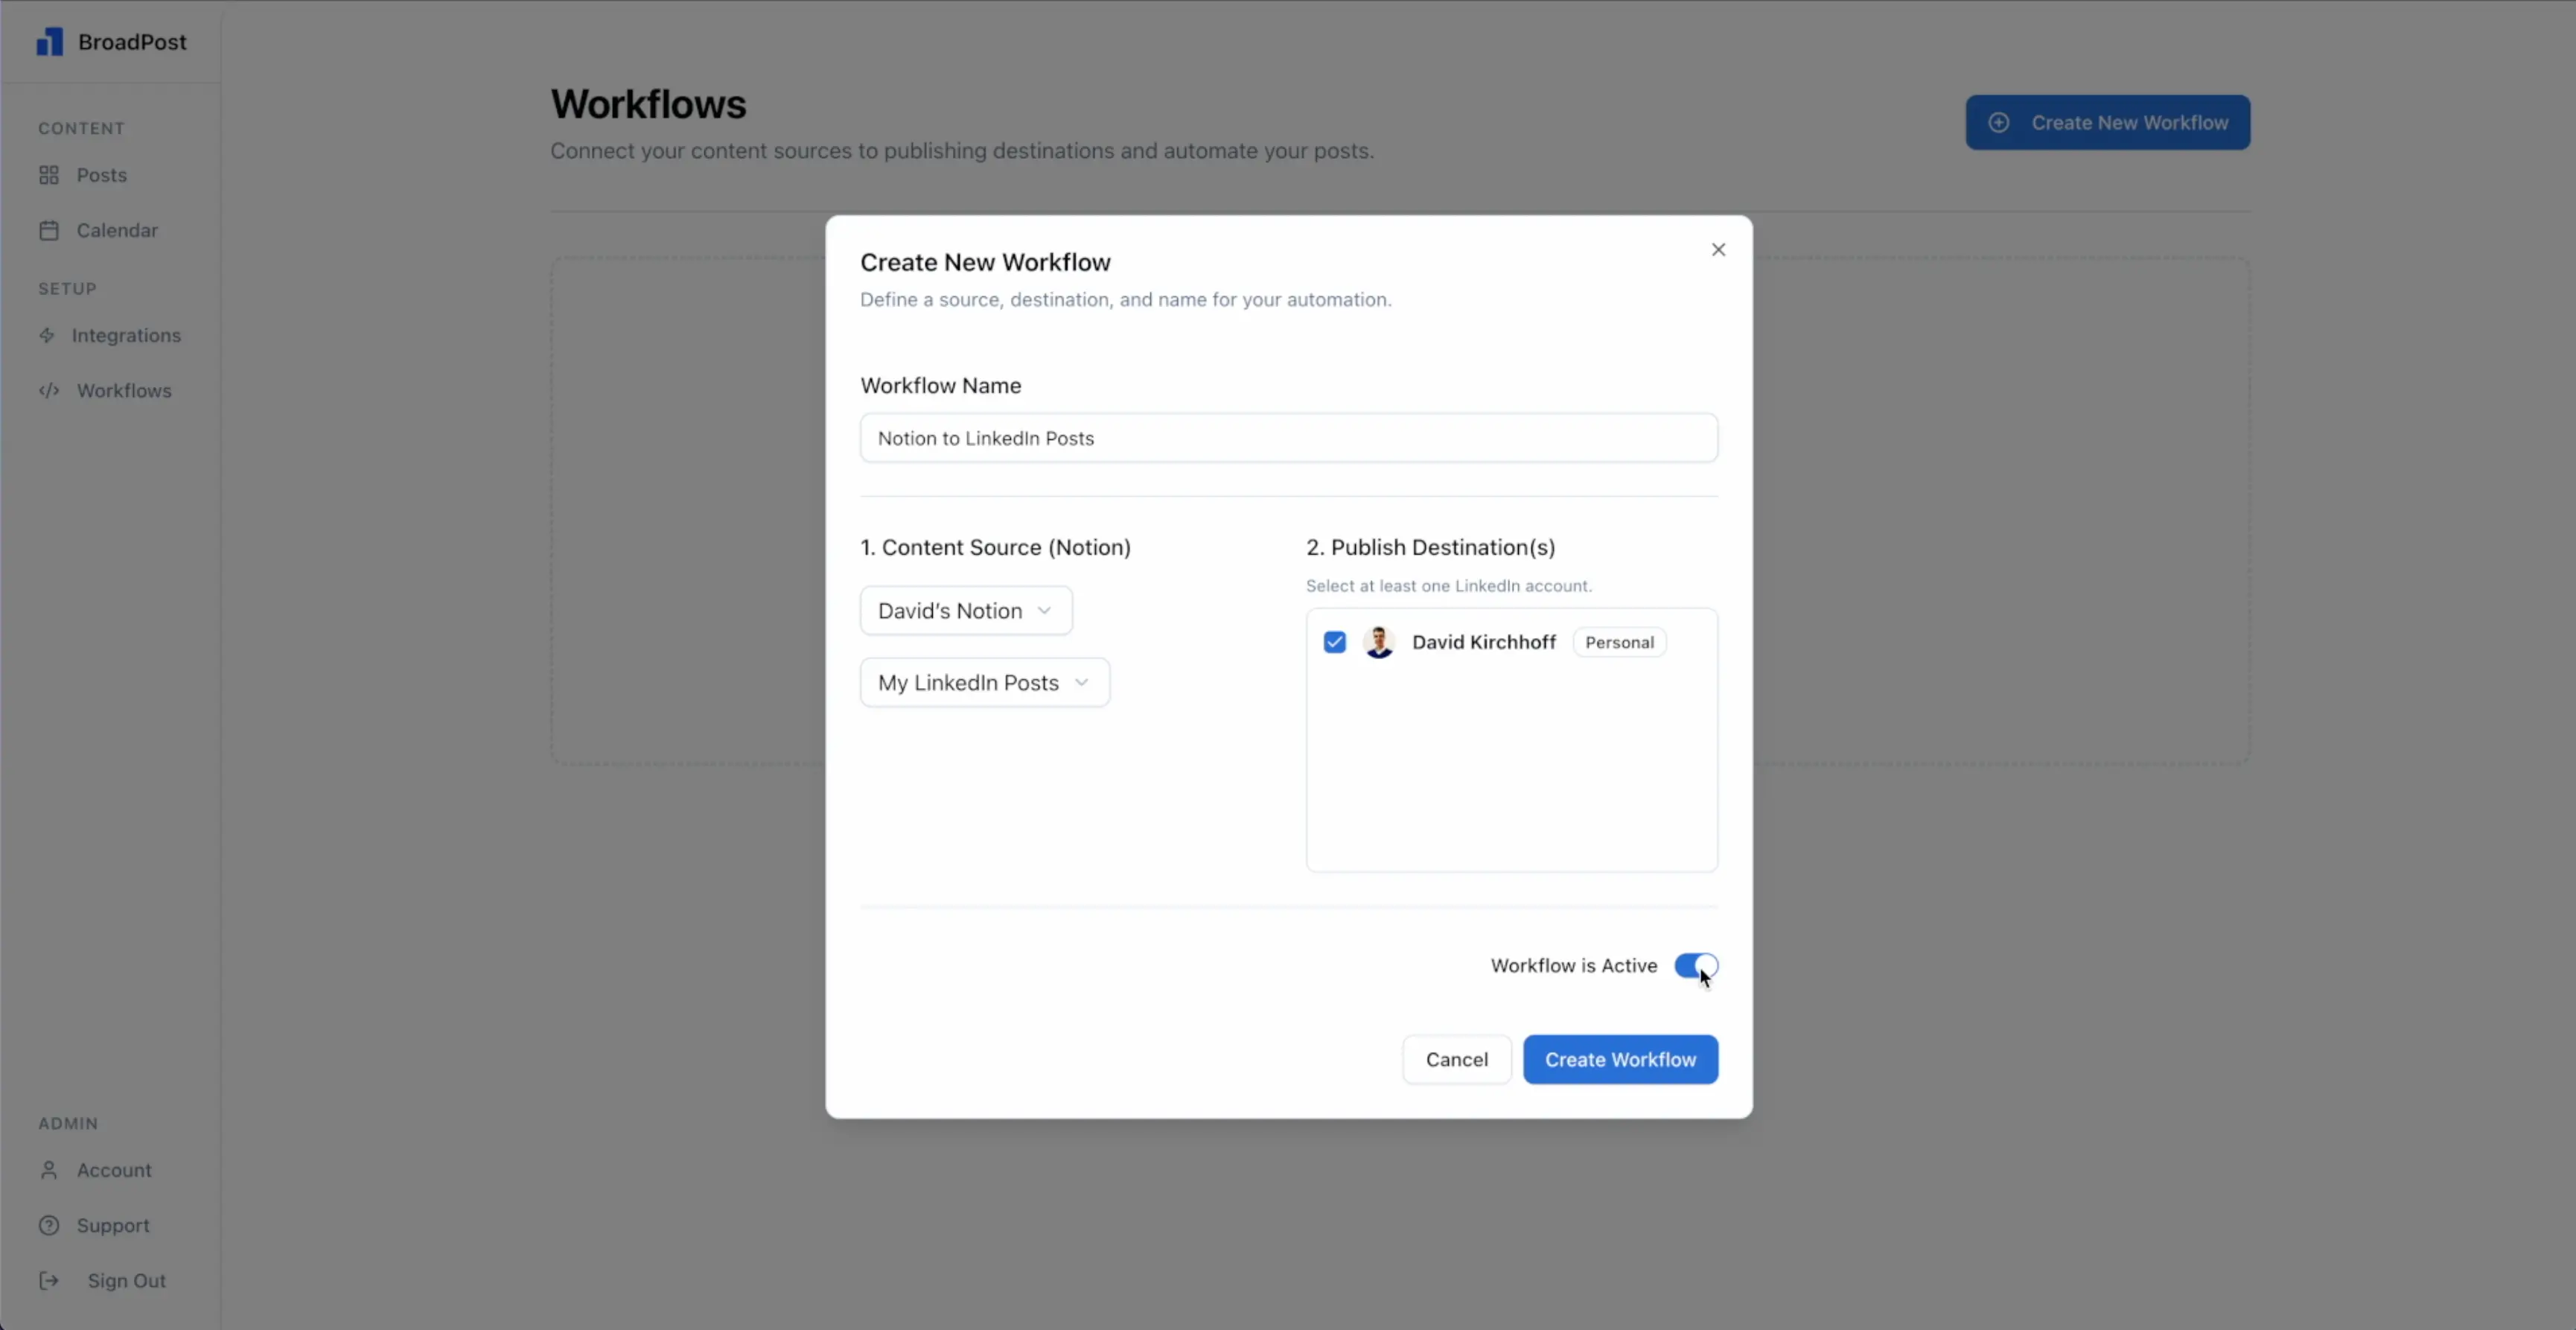
To get started with automation, let's navigate to the Workflows page in BroadPost. This is where we'll set up and manage all our publishing rules. Here, we'll click on Create Your First Workflow. A dialog modal will open, guiding us through the setup process.
Naming Our Workflow and Selecting a Source
First, we need to give our workflow a clear name. Let's call this one Notion to LinkedIn Posts so we easily know what it does.
Next, we'll select our source. This is where BroadPost will get our content from. We'll select the Notion database we set up in our first post. BroadPost allows us to pick one Notion database as a source for each workflow, which helps keep our content flow focused and organized.
Selecting Our Social Media Destinations
Now, let's choose our destinations. These are the social media accounts where BroadPost will publish our content. In this case, we'll select the LinkedIn personal profile we connected in our last post.
If we had connected more LinkedIn profiles, or other social media platforms in the future, we could add multiple destinations to this single workflow. This allows us to publish one post across many accounts at the same time.
Activating and Creating Our Workflow
Notice that our workflow is automatically set to Active. This means as soon as we create it, BroadPost will start watching our Notion database for posts ready to be published.
With our name, source, and destination selected, we simply click Create Your First Workflow. And just like that, our posts will now automatically be published to LinkedIn at the time we've set in our Notion database! It's truly set-it-and-forget-it automation.
Important Note: Managing Workflow Status and Skipped Posts
We always have full control over our workflows. If we need to temporarily stop BroadPost from publishing, we can simply set a workflow to Inactive at any time. When a workflow is inactive, BroadPost will not publish any posts linked to it.
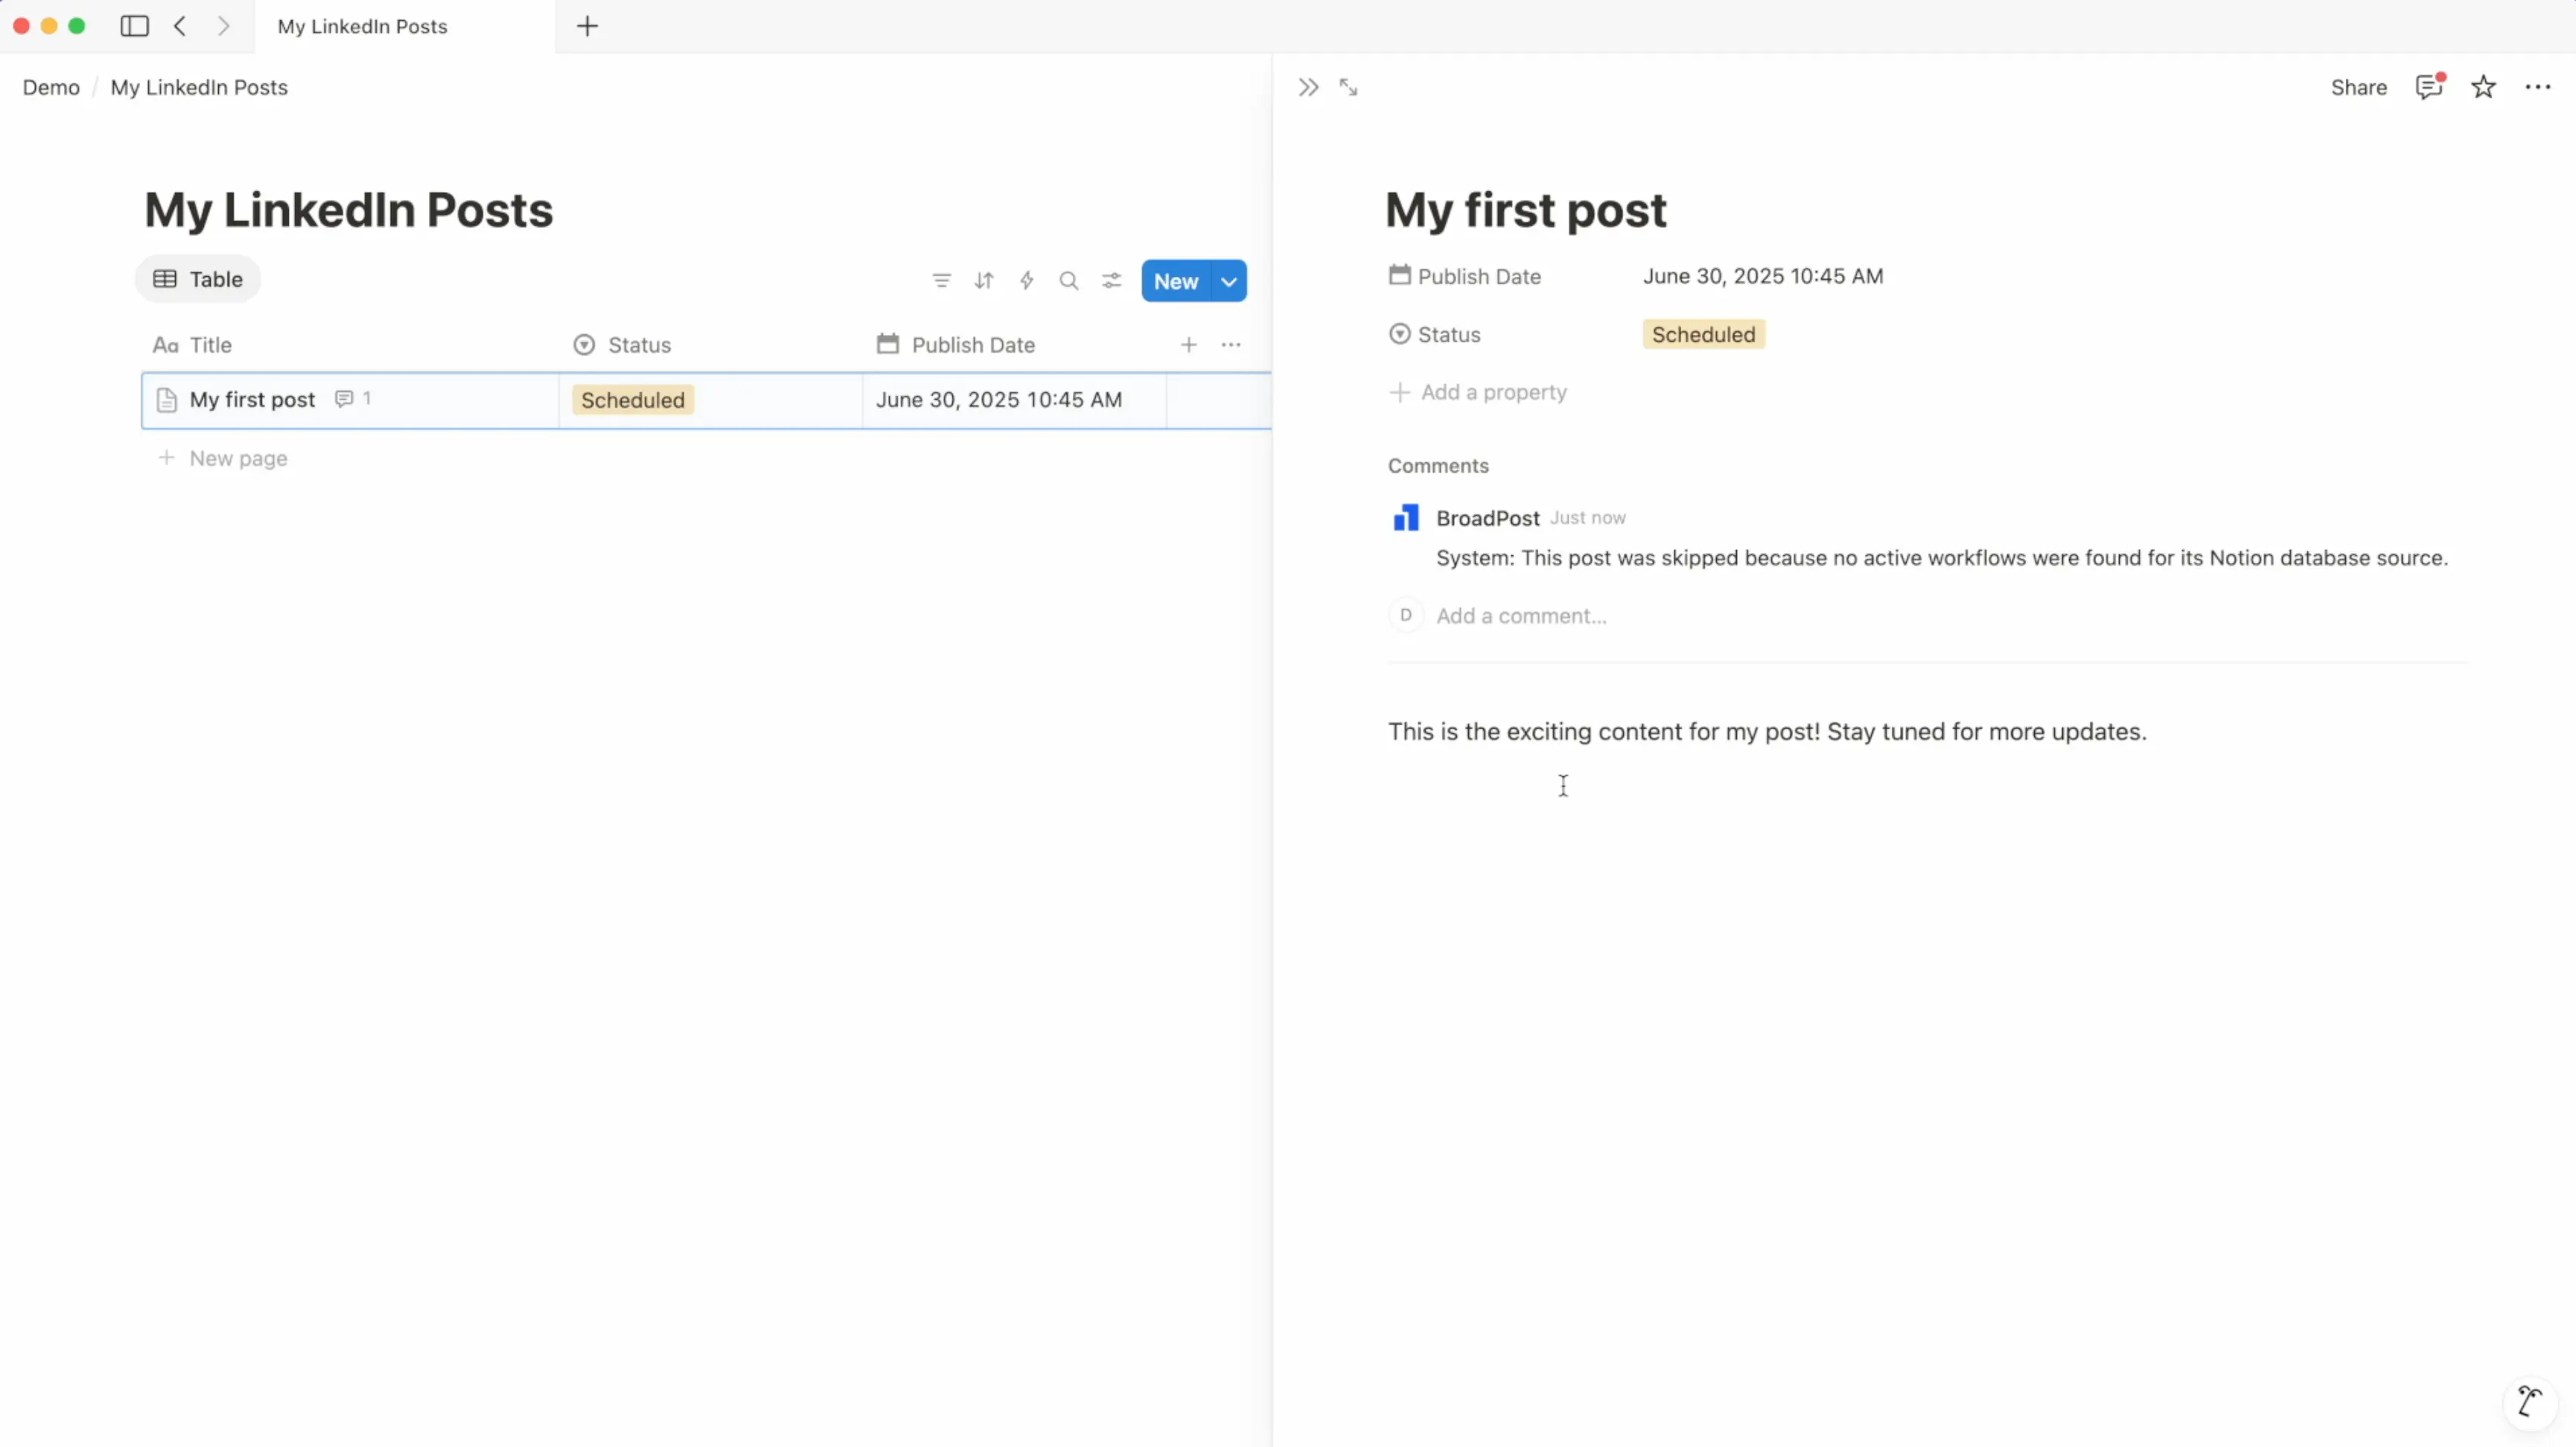
If posts are set to publish (meaning they have a publish date and Scheduled status in Notion) but are skipped because the workflow is inactive, BroadPost will add a comment in Notion explaining that they were not published because the workflow was inactive.
Here's a crucial point: if posts have been skipped due to an inactive workflow, all of them will be published immediately once we set the workflow back to Active. So, if there are specific posts we don't want to publish once we set the workflow back to active, we must remove the Scheduled status and/or the publish date from those particular posts in Notion before reactivating the workflow. This gives us full control over what gets published.
Note: The publishing behavior has been made more intuitive. Now, only posts that have
Scheduledset and have a future publish date will be published exactly at the time defined. If the date is in the past, for example because a workflow was inactive, a system comment will be added notifying you why this post will not be published.
Conclusion
And there we have it! We've successfully created and set up our first powerful workflow in BroadPost. With this automation in place, our social media content management just became much more efficient. In our next post, we'll explore how to manage our posts directly within BroadPost and Notion, including rescheduling and visualization options. See you there!